
Showing posts with label Unnecessary Risk. Show all posts
Showing posts with label Unnecessary Risk. Show all posts
Monday, June 11, 2018
Tree + Tire = Fun
Saturday, December 31, 2016
Our First Year
 |
| Getting ready to ride a water taxi into NY |
Thursday, July 28, 2016
Solar Scrub

Anyway, you can see our filthy panels above. That is after five months on the roof.
I chose the laziest method of cleaning possible and just sprayed the panels with water, which seemed to work great.
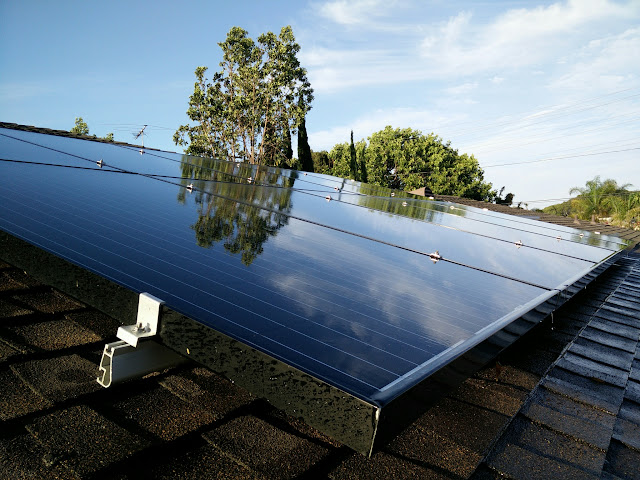
The cleaning had a measurable impact on the production of the panels. The graph below shows two days before cleaning and two days after cleaning. The panels are producing about one more kWh per day after being cleaned.

Friday, February 5, 2016
Trespassing for Tree Trimming - Redux
 |
| Before |
 |
| After |
Monday, July 27, 2015
Cable Cutting - Pekema Projects on the Road
Before:


This project actually took place back in April, but I didn't take an "After" until recently, so it's getting posted now.
A friend of ours (name withheld for security concerns) lives in a house where two guy-wires for a utility pole were anchored right in the middle of the back yard. It created a large intrusion in the yard, and the cables were very clearly not accomplishing anything. They were very slack.
We started the project by trying to dig up the anchor.

After digging quite deep, we realized it went much deeper than we expected, so we switched to Plan B. That plan was to unbolt the hardware holding the cable, but we didn't have the appropriate tools, so we switched to Plan C, the hacksaw.
Despite a dull blade, we made it though the cable. Once the cables were free of the anchor, we enlarged the hole to the side and bent the anchor over, burying it at least a foot below the surface.
The yard now has much better feng shui.
Yes, we did drape the loose cables into the neighbors yard. It's the back corner, so it shouldn't bother them.
This project actually took place back in April, but I didn't take an "After" until recently, so it's getting posted now.
A friend of ours (name withheld for security concerns) lives in a house where two guy-wires for a utility pole were anchored right in the middle of the back yard. It created a large intrusion in the yard, and the cables were very clearly not accomplishing anything. They were very slack.
We started the project by trying to dig up the anchor.
After digging quite deep, we realized it went much deeper than we expected, so we switched to Plan B. That plan was to unbolt the hardware holding the cable, but we didn't have the appropriate tools, so we switched to Plan C, the hacksaw.
 |
| Yes, he is standing in the hole. |
The yard now has much better feng shui.
 |
| After. |
Thursday, July 23, 2015

Monday, June 22, 2015
Fun Frame
 |
| Before |
Most readily available frames were a little more aggressive than I wanted, with phrases like "The closer you get, the slower I drive" (I don't need any road rage), so I ordered a custom frame from ebay. I actually got two for $10. It's a little more in-your-face than I expected due to the text font/size, but I like it.
 |
| After |
Saturday, March 14, 2015
Mounted Mobile
 |
| Before |
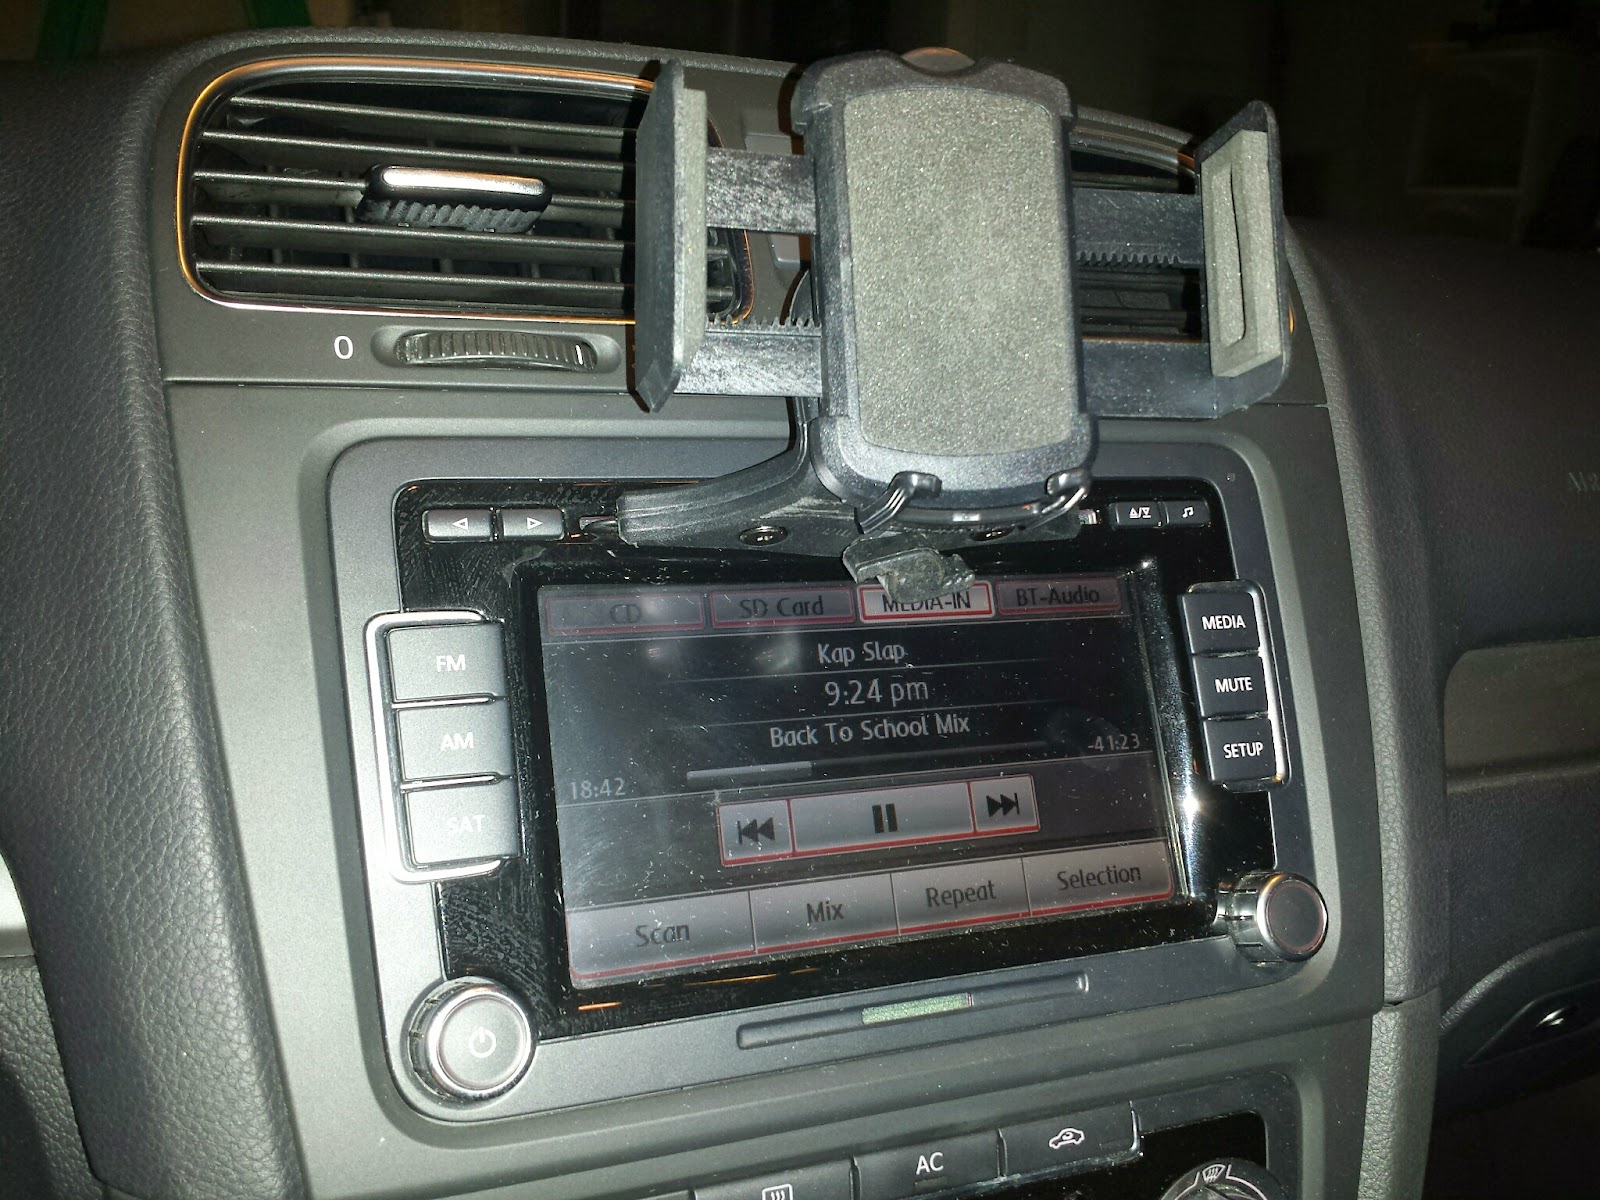
This project isn't actually on the car, but an accessory. I recently learned about the existence of cell phone cradles that mount in a car's CD slot. Since I don't like the windshield suction cup, dash-top, or vent mounted units, this seemed like the perfect solution, keeping the phone in plain view without blocking the line of sight or breaking fragile vents. It sits between the two center vents, and only blocks the emergency flasher button, which I don't like looking at anyway. The big red triangle is just too shouty.
Anyway, I bought one of these mounts and put it in the car. It is great, except the fastener that spreads the paddles in the CD slot stuck down more than necessary, which blocked part of the infotainment display. I determined there was some room to improve it.
 |
| Before |
 |
| Before |
 |
| After |
 |
| After |
Tuesday, March 10, 2015
Underbody Aero Part 4 (of 5?)

They are designed to be stuck on a car with double-stick tape, and were clearly not made to do any actual venting, but I had a plan to change all of that. I started by roughly cutting the vents open with the Dremel.

I then spent an inordinate amount of time manually opening up the holes even more with a file. I wanted them to be perfect.

Here's a nice before and after shot.

Unfortunately, after finishing the first vent, I had do do the second one.

Here's where the trickery begins. instead of just sticking the vents on the hood and having them stick up, I planned to flip them over so they would actually go down into the hood, so the only part on top of the hood would be the flange. That meant I had to remove the pre-installed double-stick tape. Under that I discovered some molding markings that would have to be sanded off.

After even more manual labor, here's the finished product compared to the original. I decided I wanted to go with a "brushed plastic" look, even though that's not really a thing.

After finishing the second vent, it was time for the moment of truth--cutting holes in the hood of the car. This was a tough step for me, because I'm reluctant to make non-reversible changes, but I decided to go for it.

The fist cut was hard, but I did it. At this point I'm committed. You can see some of the bracing was in the way.

I trimmed the bracing to optimize the fit, including the addition of speed holes.

One hole down, one to go.

The hardest part was getting the second hole symmetric with the first.

Before attaching the vents, I wanted to give them a subtle curve to match that of the hood.

You can judge for yourself if I got them straight. I think it's close enough, if you squint and tilt your head just right. At this point the vents are just sitting in the holes but I will glue them in soon. It seems to be a success. When driving, I can see heat waves wafting up through the holes.

Monday, March 2, 2015
Absent ABS
 |
| Before |
The ABS hydraulic unit is basically a big chunk of metal, weighing the car down.
 |
| Before |
The bracket that held the ABS unit also held the fuse box, but it was too heavy to leave in there, so the fuse box is now secured with a zip tie.
 |
| After |
I took this opportunity to also replace the stock proportioning valve with an adjustable one. If you're not familiar, the proportioning valve determines how much braking power goes to the front vs. rear wheels. The stock proportioning valve has a fixed distribution of braking force, which is fine for a stock vehicle, but the moment you make significant changes to the car, that balance is probably no longer appropriate.
 |
| Before |
 |
| After |
 |
| Rear wheel speed sensor. |
Check out the quality hole Mazda drilled for the sensor wire.
 |
| Almost round. |


The final piece to remove was the ABS control unit. Contrary to what the service manual says, the box is located behind the passenger seat, next to the engine control unit. It is important not to remove the wrong one.

Here's everything I removed, which weighed 19 lbs, 11 oz. (3.25 lbs of which was the wheel speed sensors--dreaded unsprung weight) I did have to install some new parts, so I will estimate the Weight Savings: 19 lbs.

I took the car for a test drive and confirmed the ABS is gone, confusing some pedestrians in the process. They couldn't figure out why someone was locking up the wheels for no apparent reason.
I also confirmed there are no leaks in the plumbing, which was a pleasant surprise (I will admit I discovered one leak while bleeding the system, but it was just a fitting I didn't fully tighten on the new tee). Now all I need to do is figure out the brake bias and I will be set. The only question is where to do that?
Sunday, February 22, 2015
Adios, Airbag
 |
| Before |
Removing the actual airbag was pretty simple. There are four bolts above where the glove box sits, and those are the only thing holding the airbag in. After the bolts were out, the shockingly large and heavy airbag unit slid right out.
 |
| After |

Since all the airbags were gone, I could remove the crash sensors as well. There are four of them, but I could only reach the three in the front end of the vehicle. The last one is behind the dash.
The surprisingly heavy sensors are well protected behind two covers.
 |
| Cover 1 |
 |
| Cover 2 |
 |
| Crash sensor. |

Here's everything that came off, including the airbag control module from under the driver side dashboard.

Subscribe to:
Posts (Atom)