Sunday, September 21, 2014

Inspiration 11

Guzzi cafe racer by Officine Rossopuro
I like this exhaust.  Could easily do something similar with the BMW.
http://www.bikeexif.com/guzzi-cafe-racer-2

Moto Guzzi V50 Monza
I really like the style of this bike.
http://www.bikeexif.com/moto-guzzi-v50-monza

Triumph Thruxton 900 by the Wrenchmonkees
I like this seat.
http://www.bikeexif.com/triumph-thruxton-900

R100 BMW by Kim Boyle
Clean BMW.
http://www.bikeexif.com/r100-bmw


Cool conversion to a mono-shock.
http://www.returnofthecaferacers.com/2014/04/valkyrie-bmw-r65.html

BMW R100RS custom motorcycle built by Cafe Racer Dreams
This is a nice BMW.  Good idea for the suspension--borrow from a modern Ducati.  Can be found cheap on ebay.
http://www.bikeexif.com/bmw-r100rs

Brat style BMW R80 custom motorcycle by Urban Motor of Berlin
I like this exhaust.
http://www.bikeexif.com/brat-style-motorcycle

Norton 850 Commando built by Federal Moto of Canada.
Norton 850 Commando built by Federal Moto of Canada.
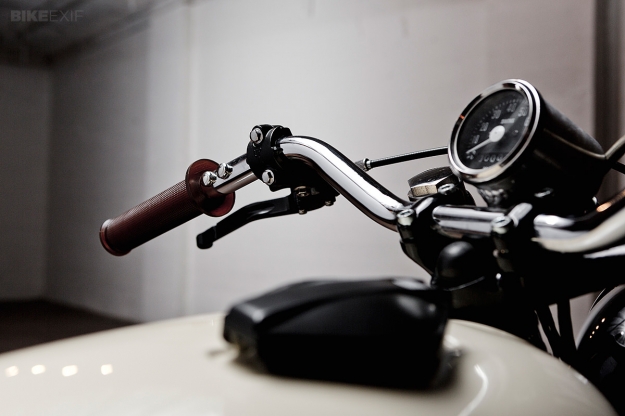
Cool controls on this bike.
http://www.bikeexif.com/norton-850-commando-2


Ducati 900SS custom by Atom Bomb.
Nice taillight.
http://www.bikeexif.com/ducati-900ss-atom-bomb

Ducati 650 Pantah customized by the Texas workshop Revival Cycles.
I like this exhaust.
http://www.bikeexif.com/ducati-650

Buell X1 Lightning customized by the Italian workshop Sartorie Meccaniche.
This is a really cool bike.
http://www.bikeexif.com/buell-x1-custom


Tuesday, September 16, 2014

Evicted Evaporator

Before
When I removed the glove box, I noticed some HVAC equipment behind it.  I figured it needed to be there to make the vent work, so I didn't touch it.  Some time later when I was under the hood, I noticed a couple fittings coming through the firewall, which I assumed used to carry A/C fluids.  I then realized the thing under the dash was the evaporator, which no longer served a purpose, so I decided to remove it.
The process was pretty simple.  I just had to remove the glove box brace then undo the two clamps, two connectors and two nuts (one of which was a pain) and it pulled right out.  I referenced this and this site. If we want to use the vents or heater, I will need to buy one of these from a non-A/C car to fill the gap where the evaporator was.
After
I covered two holes in the firewall and one in the transmission tunnel with duct tape.  Official plugs exist, but all sources indicate tape is fine.

Here's what was removed.  Weight savings:  7 lb, 8 oz

Sunday, September 14, 2014

Busted Bushing

I ordered a replacement for the cracked shifter tip bushing I mentioned earlier and it arrived, so it was time to replace it.   You can see what the old, cracked one looked like.

The new bushing has a different design.  Instead of snapping onto the shifter it has a "top hat" design that sits in the "turret" and can't fall off the shifter.  Aluminum and brass bushings are available, but I went with this delrin unit because it will absorb some vibrations and won't transmit heat.  I've also heard the metal ones can get stuck in the turret, which obviously isn't good.

Here's the turret without the bushing.

Here's what it looks like installed.  I added a little more oil than you see here.

Just playing with the shifter in the driveway, it feels significantly smoother.  I might just be imagining that, but I'm happy.


Saturday, September 13, 2014

Miata Mass

This is what my car will look like when I finish my weight reduction plan.
I weighed the Miata a while ago.  This was before removing some stuff, but I finally got around to tallying up the numbers.  This is all with a full tank of gas.

Weight without driver:  2259 lbs.  52.2% on the front axle, 47.8% on the rear.
Weight with driver (after a big lunch): 2495 lbs.  51.0% on the front axle, 49.0% on the rear.

I'm pleased with the overall weight, but I would like to get it under 2200.
I'm especially impressed with the balance.  I didn't list that much detail, but each corner carries remarkably close to the ideal 25%.

Monday, September 8, 2014

Inadequate Intake

Before
When messing with the washer bottle, I noticed the fasteners holding the aftermarket intake together were missing and ineffective.  I was able to reuse two screws, but I had to add a bunch of my own stainless hardware to button it up.

I also rerouted the mass airflow sensor wiring, which draped over the air-box oddly and was slightly melted from being too close to the exhaust.
After

Sunday, September 7, 2014

No Nozzles

Before
There were a couple, non-circular holes in the hood where the washer nozzles once lived.  I decided they needed to be plugged, so I got some spiffy little plastic plugs and crammed them in.
After

Saturday, September 6, 2014

Chucking the Charcoal Canister

Before
The charcoal canister is a popular thing to remove from the engine bay.  Its purpose is to catch fumes from the gas tank.  I normally try to avoid removing emissions equipment, but after 20 years and 100,000+ miles, it's hard to imagine it's doing anything anymore, so I decided to pull it out. I followed this guide.
After
 Here's everything that came out.  Weight Savings:  2 lb, 8 oz

Friday, September 5, 2014

Reservoir Removal

Before
The windshield washer nozzles were missing from the Miata when I got it.  They are $20+ each and I don't anticipate using them much, so I decided to go the other way and remove the entire windshield washer system.  The reservoir is located in the front, driver-side bumper--the worst possible place for weight.

I had to remove the wheel to get access.  My normal jack is too tall to fit under the Miata, so I had to use the Miata's emergency jack.
Before

This gave me a chance to actually see the fancy suspension and brake lines I paid extra for.

 The reservoir filler had to be unbolted, and that meant loosening the air intake.

After removing a couple awkward bolts, I drained the tank.

And finally removed the last, most awkward bolt and pulled everything out.  The electrical connectors were a real pain too.
After

As you can see, this was a bit of a production.
Notice the sweet hood prop.  And yes, I did use the packaging from a ceiling fan to catch the fluid.
 Here's what came out, not including the liquid.  Total weight savings (including fluid):  13 lb, 11 oz!!!

Think my torque wrench is big enough?

Thursday, September 4, 2014

Mashed Muffler

Hard to believe, but I screwed up.
It's kind of a complicated story, but the jist is I took the silencer out of the tail pipe and didn't have the opportunity to properly tighten the nut when I reinstalled it.  Chrissy was just going to drive it three miles from my office to the house, so I figured finger tight would be fine.  It wasn't.  It fell out 100 yards down the road.  Then an SUV ran over it.
Miraculously, it wasn't too badly deformed, as you can see above.  A little time with the vise and the dead blow hammer rounded things out again.  Crisis averted.

I wanted to be able to remove and install the silencer without tools, so I got a wing nut and a lock washer.  It held from home to Malibu, so it seems to be good.

Tuesday, September 2, 2014

Saving Shelving

Before
The shelves I made out of milk crates and bunk bed parts were starting to look a little questionable.  Despite not having that much weight on them, the milk crates were starting to bow outward, foreshadowing their eventual demise.
I acquired some fancy bricks from my parents that would replace the crates perfectly.  I just had to swap them out without unloading everything.  I accomplished this with the help of my floor jack.  Genius.

Here's the finished product.
After

Monday, September 1, 2014

Axing the Antenna

Editor's Note:  This is the 200th post on Pekema Projects, and it is just about the 2 year anniversary of starting the blog.  If my math is correct, that means we are averaging 100 posts per year, which I think is pretty impressive.  Enjoy number 200:
The Miata came with a lovely, non-functioning, retractable antenna.  After seeing the size of its the motor assembly, it became clear it needed to be removed.
Here's what it looked like in the trunk.

The first step was to unscrew the bezel.


After that all the components came right off.

The motor only had one bolt in the trunk holding it in.  Weight savings:  2 lbs.

To plug the hole, I installed an OEM antenna hole plug.  Yes, that is a thing.