 |
| Before. Gross, yellow, '70s laquer on doors and trim. |
You may have noticed the frequency of posts has gone down recently, but it's only because we've been working on the mother of all projects--refinishing all the doors in the house. Definitely easier said than done.
We started with a single door, to experiment with our techniques. We started with a light sanding.
Our plan was to try a gel stain, which was something we had never worked with. After the first coat, it looked like this. Not encouraging, but the instructions indicated this would be the case.
After the second coat it looked better, but we weren't happy with it. The gel stain gives a somewhat wood-like appearance, but it hides the real wood grain, which is actually pretty nice on the doors.
Since we didn't like the finish, we chemically stripped it and started over.
Our second attempt was a one-step stain and poly, in an attempt to avoid having to do multiple coats. It was supposed to be a rich mahogany (pretty dark), but it didn't look anything like the can and just made the door look like it did when we started. We quickly wiped it off as best as possible and returned it.
After some online research we found the next potential finish. Royal Mahogany Dura Seal Quick Coat stain, meant for wood floors with a clear Danish Oil top coat. Chrissy went to buy the stain and discovered it is only available to contractors...and cute girls who are very persuasive.
Thanks to the utility onesie, the stain went on beautifully. It highlighted the beautiful wood grain we barely realized the doors had.
The Danish Oil gave it the perfect sheen. Not too glossy, but nicely finished looking. This first door is slightly rough, but we deliberately used our closet door as the first test.
Once we had our system down, it was time to expand to do the rest of the doors.
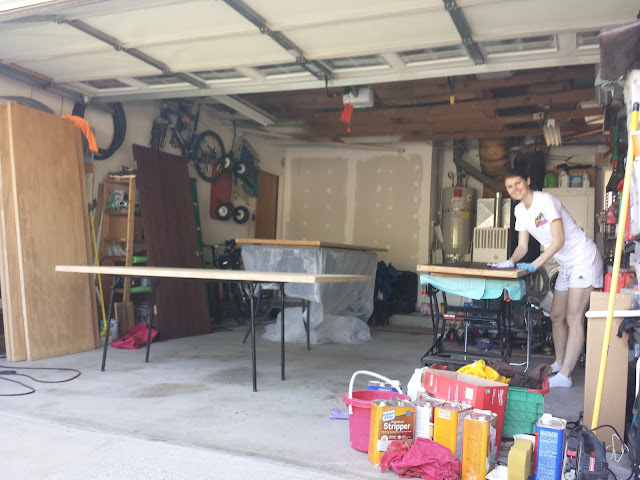
The next step was a whole lot of miserable stripping. I cannot stress enough how nasty this stuff is. Chrissy started on the ground, but after 30 chemical burns, I convinced her it would be better to have the doors at a better working height.
See how much happier she is now?
After many hours and several doors, Chrissy had had enough, so we called in backup. We were lucky to get help from my brother, uncle and cousin. We owe them big time.
We went through four gallons of stripper and scraped the goo into a steel bucket. Once the stuff dried out slightly, I dumped out the nasty clump of rags and stripper into the trash can, saving the bucket for another project.
After everything was stripped, my cousin Garland sanded every door, with a sander purchased just for this project. Notice how many there are in the stack behind him. In total, we did 13 doors (eight closet, three bedroom, and two bathrooms).
Once everything was sanded, we were able to start finishing all the doors. This took quite a while since the doors are double sided and they have to dry between coats. Procrastination played a role too.
Eventually, we got all the doors finished, but we couldn't hang them until we addressed the door jambs. This was actually all done concurrently, but it makes more sense if I describe them separately.
As mentioned earlier, the trim had the same unpleasant finish as all the doors. The first thing we tried was using stripper on a jamb. After discovering how miserable that was, and since we knew we wanted to paint the trim, we gave the rest of the trim a light sanding and moved on.
The shutter doors between the kitchen and hallway, previously mentioned
here and
here, were removed, but the hinge cutouts in the jamb remained.
I didn't want to look at them, so I made some filler pieces and carefully glued them in. There wasn't an easy way to clamp the piece, so I wedged a stick in the doorway to hold the pieces in place and draped a towel over it to make it more visible. I could imagine someone not paying attention and walking into it.
Once the glue dried I sanded the patch flush and applied some wood filler. It was now ready for paint.
After sanding each doorjamb they all got at least three coats of paint. Yes, it was very tedious, just like the rest of the project. Thanks again to Garland for finishing up the painting.
We also had to get all our hardware in order. That meant painting the closet door tracks.
I also cheaped out and painted the old hinges flat black.
And the screws.
We did, however, spend a little money on new knobs for all the doors. We went with the Venetian Bronze finish because it went great with the new door color.
With everything ready, it was finally time to hang the doors.
I also painted the closet door pulls. I wasn't about to pay $7 per set for new pulls in the correct finish.
We are very happy with the way everything turned out, but we never want to do it again. It's amazing how nice relatively cheap, flat, hollow-core doors can look.
Unfortunately we skipped the door to the garage and the front doors because we didn't want them removed for a long period of time. Hopefully they will go fast since we are now experts on the process.
Update: I just realized I didn't include the total cost for this project. Here's the approximate breakdown:
Materials
Stripper: ($20 x 4) $80
Stain: $15
Danish Oil: $10
Trim Paint: $40 (lots of leftover)
Spray Paint: $5
Closet Door Rollers: $15
Knobs: $110
Total: $275
Labor
David: 4 Beers
Garland: 3 lbs lentils
Mike: 6 gal herbal tea
Chrissy: 32 chemical burns
Andy: Sanity
Total: Indeterminate


