Saturday, December 13, 2014

Futile Fan

During my headlight removal (more on that later), I discovered one of the two electric fans mounted to the radiator (passenger side) was mostly for the air conditioning, so I didn't think I needed it any more.  This discovery came about due to two large relays that were mounted to the headlight.  It took a pretty deep dive into the wiring diagram to figure everything out.
Mystery Relays
Here's the fan from below.  I also removed two of the elbows you can see.
I hope you appreciate this photo, because getting below the car is not a trivial task.
Here's what I pulled out.  Weight savings:  3 lb, 1.7 oz.

I had to disconnect the coolant hose and remove the intake tube to get the fan out.


 And here is the final product.

Saturday, December 6, 2014

Trespassing for Tree Trimming

These are some of the worst things in the world.  They are dropped by our neighbors tree onto our patio, and they hurt even more than Legos when you step on them barefoot.  Something had to be done.
It turns out that something was reaching over the fence and cutting off the branch that most protruded into our yard.  Here's the before and after.


Before
After

Wednesday, December 3, 2014

Drawer Drama

Before
The drawer on Chrissy's desk decided it didn't want to be one piece anymore, so I had to take action.  It was held together by a couple plastic brackets, which had snapped.  I bought some small metal "L" brackets to replace them.  Amazingly, I was able to use the same holes and half the original hardware.  The other half I replaced with stainless steel pieces.
After
After

Tuesday, December 2, 2014

Crappy Case


I bought this case on Amazon for my new (used) cell phone.  When it arrived it was not what I expected.  It was much thicker than necessary, and also thicker than the product photo indicated it would be.  There was no thickness listed, so I was forced to rely on the photo for an estimate.

Here's an image that illustrates the problem.  I spliced together a picture of my case and the product photo from Amazon, scaling everything correctly.
 As you can see, there is a significant difference between the picture and reality.

I contacted the 3rd party seller and they offered a refund or exchange for a slimmer model, but I would have to pay for return shipping, and deal with going to the post office.  For a $8 case, it's not worth it.
I felt they should cover everything since they misrepresented their product, but they disagreed, and I didn't feel like fighting.  I took matters into my own hands instead.
The case was too thick, so I made it thinner.
Before
After

Sunday, November 30, 2014

The Cold Drizzle

Miss me? Yes, we have been behind on projects. Why? Because all of the projects we have left are little horrible projects we don't want to do. Or, on the flip side, they are giant horrible projects we don't want to do. Ok, enough chit chat. Here is what I decided was absolutely necessary to get my project on.

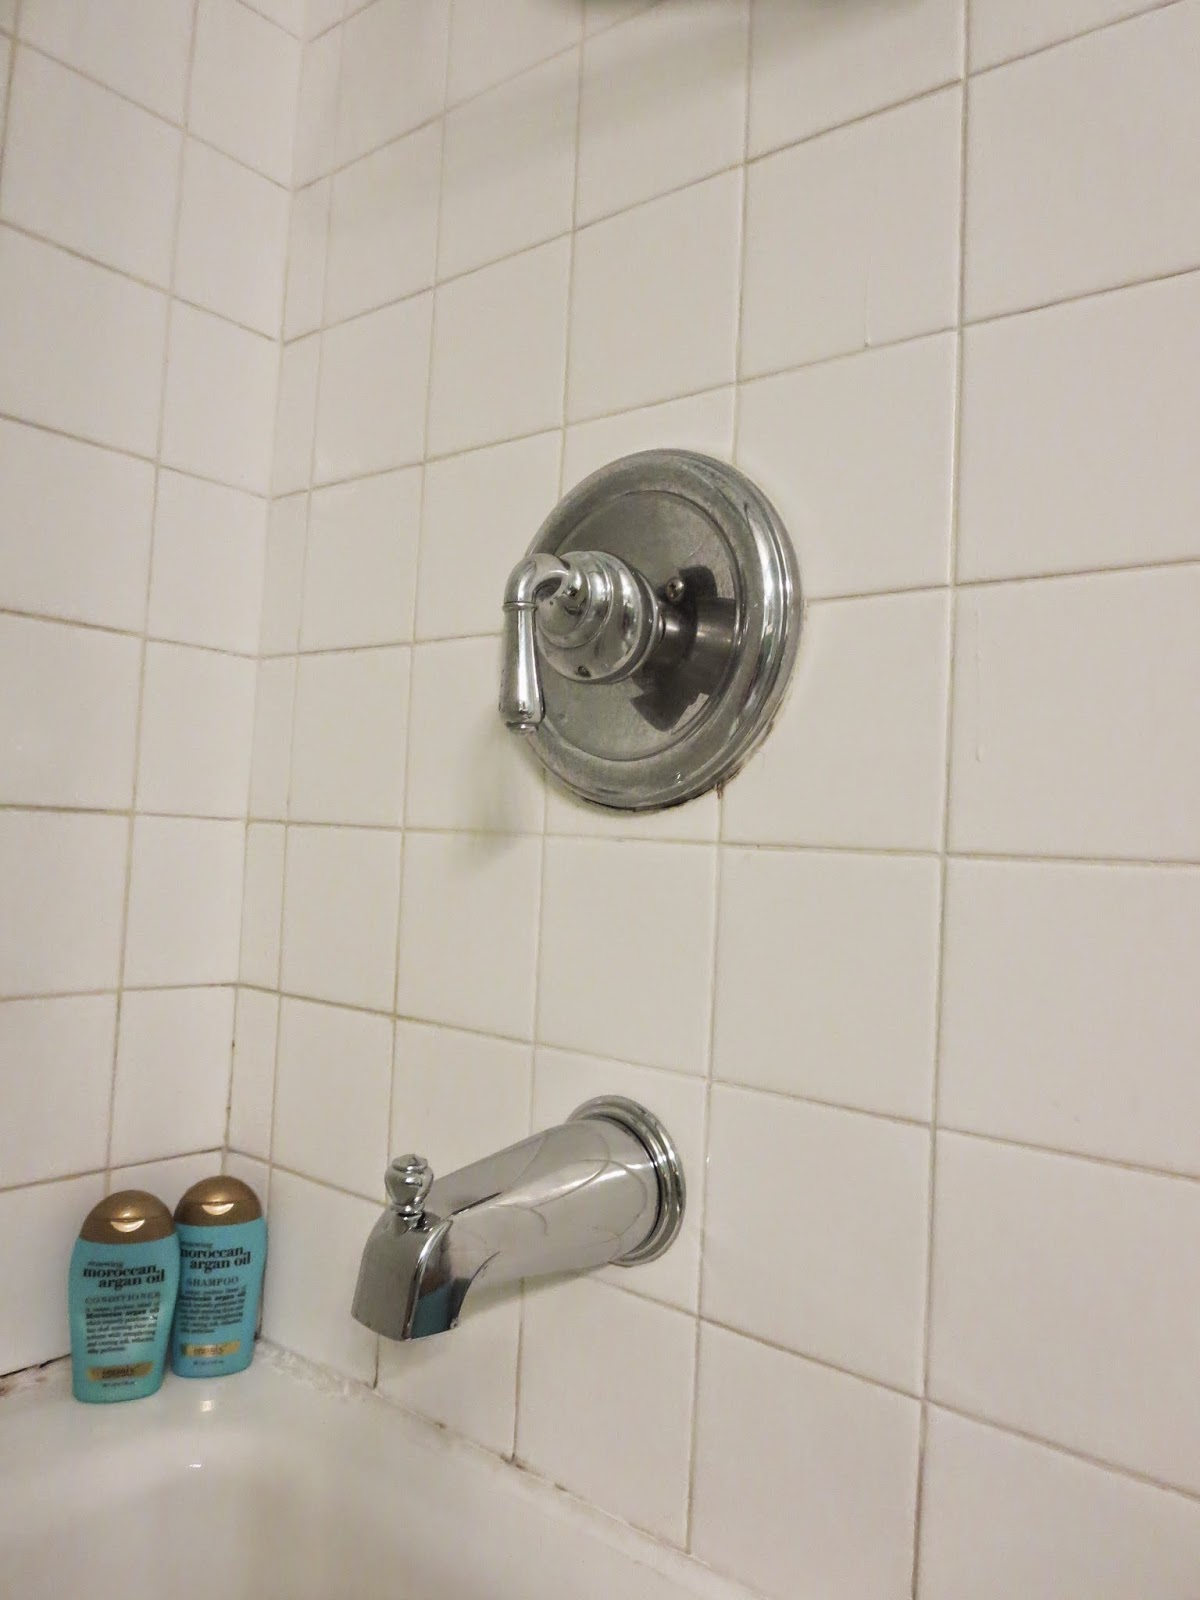
Our guest bathroom is the never ending project. It's the shower this time. The funny part is we have never used the guest shower in all our time in this lovely home. It has however, been used by our guests much to their chagrin. Each time one of our guests would exit our shower they would attempt to bring up the delicate subject. Oh, what could possibly be the problem? First, the shower head is ultra low flow. So low flow that it feels like a drizzle of ice water trickling down your spine. I know this because it is our old miserable shower head we replaced in our bathroom because it was so miserable. Aren't we nice? Secondly, the faucet is old and giving out, so every time the water was turned on and then diverted to the shower, water would spray out of it in every direction. All of the directions, people!

I had enough. I couldn't let another loved one suffer the misery that is our guest shower. Hubs? Didn't care so much. So, I had to venture into this one on my own.

Off to the hardware store.

I started by replacing the worn-out faucet. Then very easily replaced the crappy shower head with a low flow (but higher gpm than the last one) hand held shower head.

The project was quick and painless. I just followed the instructions on the packaging exactly and then tested everything. It took very little time once I had all of my tools and new purchases.

Bring on the holidays and bring on the guests.

Before:

 After:

I found an identical faucet to replace the old one. This saved me from having to replace the handle portion and ensured a clean installation.

Thursday, November 13, 2014

Miracle Product: Voltage Detector

I bought this electrical testing kit for the multimeter quite a while ago and never used the other items, until I installed the fan in the bedroom.  The little pen/flashlight looking thing is a voltage detector, and it's great.  You just hold it up to a wire and it tells you if it's live, without stripping it or touching a bare wire.  It's a miracle.

Tuesday, November 11, 2014

Rusty Roll Bar Holes


We bought the Miata with a roll bar already installed, which saved me a lot of time and effort; however, the holes that needed to be cut were not the cleanest.  There were some burrs and rust that I wanted to clean up.
I started by grinding off the burrs and rust with the Dremel then did a little masking.

I finished it with a little flat black Rustoleum to hopefully deter rust in the future.

Monday, November 10, 2014

Back to Baseboards

Before
The baseboards in the hallway have had the nail holes unfilled since we bought the house.  Somehow it's taken us this long to correct it.
You can see the holes every one or two feet.
Before
 I just used a little white wood putty to fill everything in; I didn't even bother painting.  It looks much better, as you can see below.
After
After

Sunday, November 9, 2014

Windshield Trim

The Miata had plastic trim around the windshield, which didn't really accomplish anything and actually obscured the top quarter inch of windshield (which is significant when you're tall), so it had to go.
I started by removing a couple little ovals, which may or may not have held visors at some point.

Then I removed the rear view mirror, which was harrowing.  You just yank it off, hoping the spring loaded clip doesn't break.

I originally planned to just remove the center piece, but the side trim wasn't doing anything either.

When I finished I just popped the mirror back on.  It looks a little more industrial, but I doubt most people would notice.
Weight Savings:  1 lb, 3.4 oz

Saturday, November 8, 2014

Ragtop Rail Removal

Before
We took the top of for a sunny drive today and I noticed a metal rail that wraps around the back of the passenger compartment.  It looks like the soft top attached to it, but since I don't have a soft top, there's no reason to keep it on the car.  All it took were a few bolts and the three separate pieces came right off.
After
I also noticed a random little bracket behind the driver's seat which I removed.
Total weight savings:  4 lb, 1.4 oz
Before
After

Saturday, November 1, 2014

Sinking Seat

My seating position in the Miata was acceptable when we purchased it, but only with the pad removed from the seat.  After a long drive in Malibu and a sore butt, I decided it was time to lower the seat.  I knew it wasn't going to be too easy, given that the seat was hard mounted and was already as low as it was easily going to go, but I had a plan.

Here's the rear mount.  The seat is already mounted as far back as it can go, but the bolt is in the top hole, and there are two lower holes, begging to be used.

It was easier to remove the seat and mount together than to remove just the seat.  I did vacuum.

Here you can see my main obstacle.  The bottom of the seat was already hitting the cross-bar of the mount so it didn't want to go any lower, but I had a plan.

I put the mount back in the car and proceeded to wail on it with the largest hammer I could find.

I forgot to take a picture right after the beating, but here it is after I touched up the paint.

Here it is mounted on the seat.

And here's the bolt, now one hole lower.  I can now sit in the car with the pad in the seat.  I might even be able to fit with a helmet if I remove the pad at track days.  I call this project a success