Thursday, February 21, 2013

Night and Day, our Guest Bathroom Redux

The grout was not the only problem in our guest bathroom, as you can see everything was a form of beige. It looked like a cheap apartment bathroom with yellowed counter tops, crappy bottom basement cabinets, plain walls, and a giant mirror that lacked personality and had some rough edges. So, without blowing our savings I wanted to redo everything. We redid the whole bathroom for less than $100 because I busted my hiney and basically just painted everything.

Here is the bathroom all primed (counter top, walls and cabinet all with the same primer). The grout was finished in a prior blog you can check out here: http://www.pekemaprojects.com/2013/01/the-grout-bad-and-ugly.html


Even just primed white, it looks so much better. But, it still needed some personality.

I started with the vanity. I went bold. Hey, it's just paint. Also, screw bitchass beige. 

 I painted the ceiling pure white, since I had bold colors for the rest of the space I wanted clean white on the ceiling and any other details such as the new frame for the mirror.

Next, I painted a couple coats of white paint on the counter top. My plan was to have a clean white counter top with sparkles. Yes, sparkles. It turns out that Martha Stewart discovered my need for sparkles and invented this: http://www.homedepot.com/p/t/203405351?langId=-1&storeId=10051&catalogId=10053&R=203405351&catEntryId=203405351#.UR8kSqWsh8E
I bought white to keep it simple and clean looking.

Next I tackled the walls. I painted them a relaxing blue shade; Sherman Williams Watery.


Next I had to add the new hardware. We replaced the hinges as well as added handles just to update the whole look. 


Here are the hinges

And this is the cabinet front with the new handles installed.


I hung this candle holder that my Grandma got me. It was black so I had hubs spray paint it white (I also had him paint the vent covers). I later also painted the screw heads white since they stuck out like a sore thumb.


I then finished the counter top (photographing the sparkles was impossible, I know, I'm sorry. Don't worry they are amazing in person). I applied 2 coats of Martha's magic glitter paint and 8 or so coats of poly-acrylic. In the interest of full disclosure I would like the counter to be shinier. UPDATE---DO NOT USE POLY ACRYLIC----- it peels when water gets on the counter. Use a pour-able epoxy or whatever finish comes in a counter painting kit to save yourself the headache.

A new TP holder, brushed to match the hardware.

Told ya they match. :)

Next we framed out the mirror with  moulding along these lines:

 We used a miter box to cut each corner at a 45 degree angle. Not all miter boxes are created equal. I suggest you are prepared for some sanding just to make sure they line up well. We used Liquid Nails to adhere the moulding to the mirror. They make a mirror and glass specific liquid nails. It worked very very well. After pressing the moulding into place, hubarooski held it in place while I taped it down. 


 We left the tape in place for a full day to ensure it stuck. That's it. Everything painted and framed out, Hubs and I love it so much we stop and peak in periodically just to make sure it is still awesome. It always is.  Here are a few more pictures of the "after" because I love pictures.


I am still working on a painting for the empty wall. I am going with something colorful and I will put it in a thick white frame just to add one more pop of color. I love how our bathroom just bursts with personality now. :) Yay.


Saturday, February 9, 2013

We are Stacked

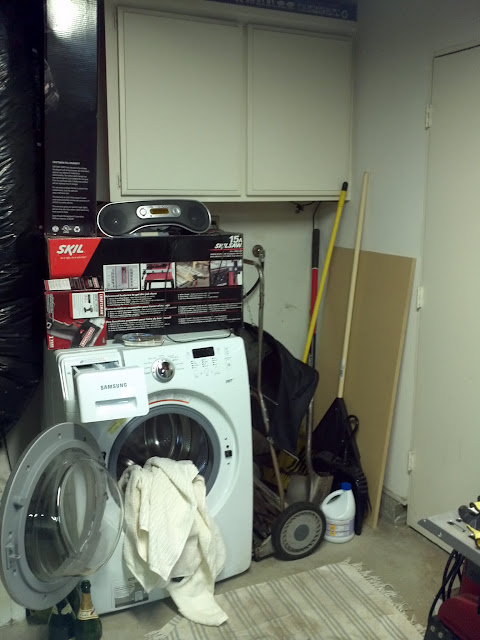
As I think you know, we purchased a washing machine shortly after moving in.  We did not buy a dryer; just a clothes line.
It just so happened that Chrissy's uncle is upgrading his washer and dryer and he was kind enough to give us his old dryer, which, as far as I know, works perfectly fine.

We could have easily placed it next to the washer, but we want to install a utility sink, and that is just about the only location one could possibly go, so we decided to think vertically.
The first step was to remove the large cabinet you can see above.  That was a miserable job that entailed pulling about 30 nails buried deep in the wood.
Next, we needed to come up with something that would hopefully prevent the dryer from falling off of the washer.  We decided to put a plank of wood (leftover fencing) under each side of the dryer, which would prevent a single foot from slipping off.
Chrissy even used a router to create a divot for each foot.  The end result looks like this:

The last step will be to mount that small cabinet (which came out of the guest bathroom) and install the sink, probably with the assistance of a professional.

Tuesday, February 5, 2013

Inspiration 5

Hammarhead Industries Moto Guzzi V7
This is a cool bike.  I like the exhaust, and the whole bike is a bit chunky, like mine.
http://www.bikeexif.com/hammarhead-moto-guzzi-v7

Honda CB550 cafe racer
I like the "urinal trap brake lamp" on this bike.
http://www.bikeexif.com/cafe-racer-honda-cb550


Another interesting exhaust that could work for me.
http://pipeburn.com/home/2013/1/31/2012-triumph-bonneville-by-vintage-racer.html


This is a clean version of my bike.  Has the black wheels I like, along with a lot of other black.  He also got the air filters like I want, but, quite frankly, relocating that giant battery doesn't work for me.
http://www.advrider.com/forums/showthread.php?t=483793


I like the exhaust and headlight on this one.
http://pipeburn.com/home/2013/2/2/1980-honda-cx500-testardo.html

BMW R75 custom
Another clean BMW.  Where's the battery?
Has a sweet oil temp dipstick.
http://www.bikeexif.com/bmw-r756

Saturday, February 2, 2013

Clutch

The image above shows the clutch assembly in the engine.  I needed to separate those two items in order to investigate some suspicious clutch behavior and clean everything up.

Since there is a pretty powerful spring compressed inside the clutch, it is actually a fairly delicate process to remove.  The first step is to remove the six bolts you see in the photo.  I soaked them in penetrating oil, and they were still very tight, and when trying to loosen them, the whole assembly turns.  I finally broke down and bought a cordless impact driver (and as I learned, not to be confused with an impact wrench) that works with batteries I already have.  I got the impact driver because I figured it would be more useful in the long run than a dedicated impact wrench.  I looked at the torque specs but they didn't seem that different.  Anyway, the impact driver didn't budge the bolts.  I was somewhat dejected, but I decided to try removing them manually one more time and they came right out.  The impacting may have loosened things up.

This is the tricky part.  You actually have to remove every other bolt and then insert different longer bolts into those holes, along with some spacers (I used sockets).  You then remove the three remaining original bolts.  After that, you slowly remove the longer bolts in unison.  This allows the spring to decompress gradually.  It looked like this:

I eventually got the thing out, and things were looking good.

Until I cracked it open and discovered the friction surfaces are covered in rust.

I'm not exactly sure how I should proceed.  I'm inclined to sand/buff the rust off and give it a try.  The actual clutch disk is well within the spec for thickness.  One other question is how to tell if it has been contaminated with oil.  I think it might be one of those things that is obvious when you see it, so I think I'm good there.

Now I need to decide if I want to remove the flywheel.  I probably should in order to clean everything out, but it's a pretty sensitive process and I really don't have to.  We shall see.

Miracle Product: Television Antennas


I know you've seen this picture here before, but I want to take a moment to appreciate how amazing it is that I can get 127 television channels out of thin air...for FREE.  Incredible.  This is one of the advantages of living in a large urban area.

Friday, February 1, 2013

Over the Air


Some would say it's silly to host a Super Bowl party if you don't have reliable television reception.  I saw it as motivation.

After inviting all of our friends over for the party, I ordered a reasonably sized outdoor antenna on Amazon.com.  I originally planned on mounting it in an inconspicuous place somewhere outside, but when it arrived there was a picture of it in an attic, which made me remember that is a thing people do, and it would work quite well for us.

I proceeded to start assembling the antenna but paused and finally stuck my head into the attic.  To my surprise, there was already an antenna sitting there, twice as big as the one I had bought.

At this point I had to re-evaluate my plans.  I had Chrissy crawl into the attic and trace the lines, and eventually pull them out of the dining room wall.

This was the old style of wiring with a half inch of flat plastic separating two thin wires.  A quick trip to the local electronics store secured me an adapter that terminates in a coaxial connection.

I then rerouted the coax cable that was already coming into our living room from the side of the house to one of my attic vents and connected it to my little adapter.

The moment of truth came when it plugged it all into the TV and scanned for channels.  As you can see in the lead photo, it (miraculously worked and) found 127 channels, many of which are in crystal clear hi-def.

Great Success!  We are now ready for the big game.