
Showing posts with label HOT TUB. Show all posts
Showing posts with label HOT TUB. Show all posts
Thursday, May 10, 2018
Pekema Projects Returns(!!!) - Torrance Recap
Tuesday, February 23, 2016
Hot Tub Heroics


The next step was to drain the spa and let the product cure. When he spa was finally empty I wiped it down to get rid of any residue and let it sit.


Four days later we refilled the spa and it seems to be leak free. The patch is supposed to be permanent and strong, but I'm still too scared to turn the jets on for fear of it blowing out the repair. I will keep you updated if anything happens.
Monday, February 8, 2016
Spa Vac Victory

Our handy-dandy Spa Vac broke. As you can see below, the flapper on the one-way valve broke off. This a very critical part and the unit is useless without it.

I procrastinated on ordering a new valve because the part was $2.10 but shipping was $9.46, and I refused to order as a matter of principle. Luckily, my dad isn't as cheap or stubborn as me and he surprised me with a new valve on a recent visit.
After herniating myself trying to remove the old valve (eventually cutting it off), the new one popped right on and the Spa Vac is back in action.

Thursday, September 17, 2015
Panel Position - Pekema Projects on the Road
 |
| Bad Placement |
 |
| Good Placement |

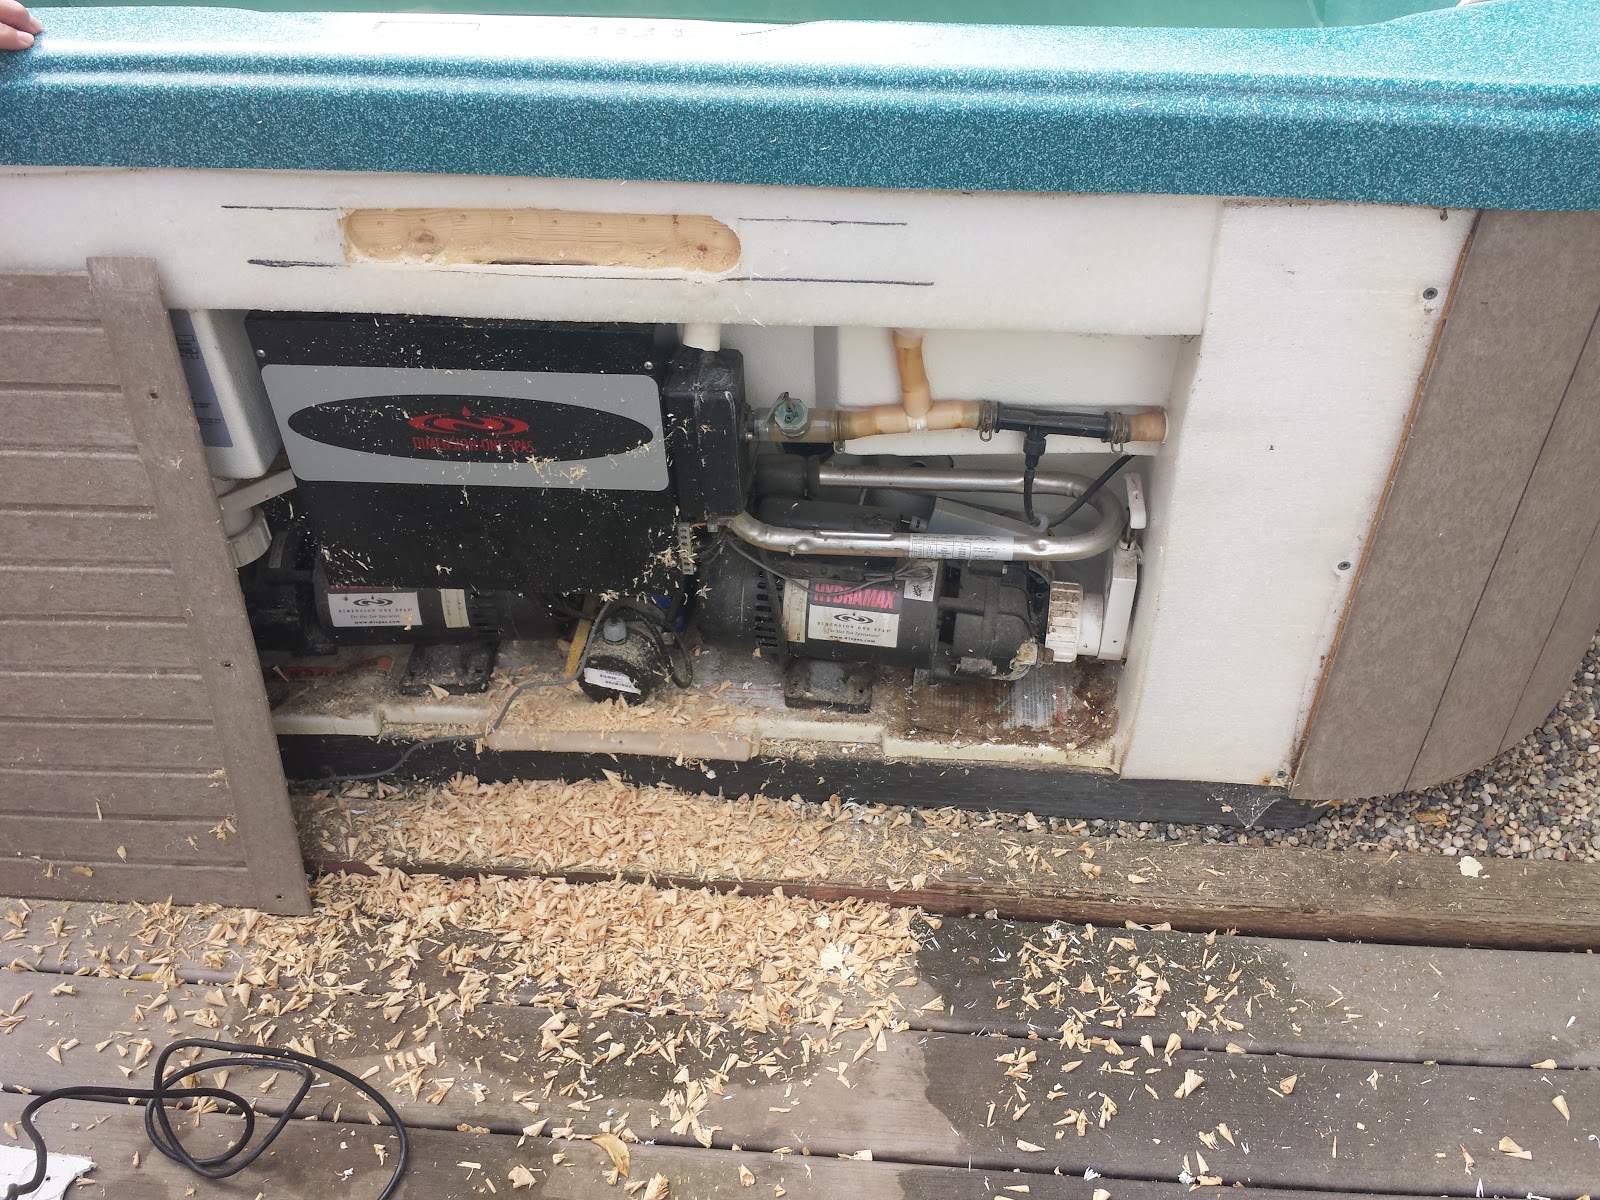
In no time at all we had bored out a recess for the panel, making a great mess along the way.
 |
| Dad provided me with the world's dorkiest safety goggles. |

Everything went together smoothly and it looks great. Hopefully this will be a more robust setup.

My mom will be adding some material to the cover that will protect the control panel from direct exposure to the elements.

Sunday, March 16, 2014
Re-Patching Hot Tub Paneling


Monday, December 16, 2013
Patching Hot Tub Paneling
 |
| Before |
 |
| The staple has been removed, but you can see where it was. |
 |
| After |
Sunday, November 24, 2013
An-D Lifter Update a.k.a Cut The Rope

FYI This is the 150th post on Pekema Projects.
As I mentioned in my previous post about the An-D Lifter, the ropes aren't actually doing anything since we had the table to support the cover.
The ropes were starting to look tattered due to exposure to the sun, so I decided it was time to remove them. I figured I would remove the eye screws too, since they have no purpose without the rope. On top of that, the one in the walkway is a toe-stubbing hazard.

To my delight, I discovered/remembered the tip of my driver broke off in one of the screws when I installed it, so I had to go to some effort to remove it before I could get the screws out.

Tuesday, April 16, 2013
Introducing the An-D Lifter

We needed some sort of solution for moving and storing our hot tub cover while we were using the tub, so I decided to copy a product I knew worked. My parents have had something called the E-Z Lifter on their hot tub since they got it, and it is an incredibly simple and effective tool for handling the spa cover. Unfortunately, I believe it is also overpriced. Prices range from $120 to $190, for what is essentially an rectangle made of light aluminum tubing.
It was clear this product could be easily copied, so I went to Home Depot and got all the necessary supplies to build a version of my own for less than $40. The cost could be as low as $20 if you already have PVC cement and some spare rope to use.
The result is a perfectly usable tool for a fraction of the cost of the original, with twice the style. Or not.
Original E-Z Lifter:


New and improved An-D Lifter:
Here's the play-by-play:
I had to start by fixing/reinforcing the hot tub cover. It is the most worn part of the tub, but only really at the seam. I got a five inch wide roll of awning repair tape and went for it. The result seems good so far. We'll see how long it lasts.


Now I could get started on the lifter. It started with creating a mounting point for the support rope. I went with a 2x4 block.

I even got fancy and centered the hole with a high tech method, known as an X.

Four inch blocks, one of which I shaved down a bit.

Some light finishing work with the rasp and sandpaper.

Eye screw test fit.

After painting and realizing I forgot to countersink. Another coat finished them up.

Mounting done. Stainless steel, of course.

The first test. It works!
I decided to add a small table to actually support the weight of the cover when it's raised. This should extend the life of the cover and my repair job. We found the table on the street, and its height is just about perfect, after I shortened and evened out the legs. With the table, the support ropes aren't even needed.
The only (surprisingly minor) injury from the project. The table got away from me while maneuvering it for trimming.

Thursday, April 11, 2013
Step Up

We got a set of steps for the hot tub to make ingress and egress more convenient. They are from Amazon.com and are pretty sturdy, considering they are made of fairly light plastic. In hindsight, I'm not sure why I didn't just build some steps from wood, but at the time I didn't feel like it.
Best of all, it has storage.

Thursday, April 4, 2013
IT'S ALIVE...again...for now

My boss did a great job of replacing the relay and adding wires as additional current flow paths. Instead of buying the replacement board for $130, I got to use $550 of his time. The actual cost to us was $4 for the relay and this:

Thank you Ken!
Re-installing the board was fun. The connectors for the power wires are a pain.
 |
| Genius at work. Notice the safety glasses being used effectively. |
 |
| Genius on the verge of electrocution. |
Tuesday, April 2, 2013
Hot Tub Wiring
Here's a snazzy video featuring a sexy narrator describing the electrical hookup for the hot tub.
Friday, March 29, 2013
Hot Tub Carnage

Apparently this is a flawed design, with many people experiencing this failure. The board has actually been redesigned. Here's an excerpt from the description of the new board: "It's upgraded design provides a more efficient method of connecting the heater's power cord to this board therefore reducing fatigue on the three relays." I certainly hope so.
I think this hot tub has only been run on 110V for it's entire life. We wired it to run on 220V, which it is designed to be able to do. The big difference is the heater runs at 1500W on 110V, but when connected to 220V it runs at 4X the power, or 6000W. Apparently that's too much for this circuit board to handle.
The current plan is to have my electrical engineer/soldering pro manager at work replace the relay (which has been ordered for $4) and add some additional wiring to supplement the traces on the board (recommended on the forums). I have also contacted the manufacturer and requested a free replacement board with the new design.


Monday, March 25, 2013
The Highest Highs and the Lowest Lows
We got the hot tub wired up and working last Wednesday (3/20/2013). It heated up in about five hours and we enjoyed our first soak that night.
The electrician did a great job (following my instructions) and the result is a clean install.
Unfortunately, after about two days of operation the hot tub stopped heating. After some investigation and failed attempts at repairs by me, Chrissy discovered what appears to be a blown relay on the heater control board. We are going to try to replace it and see what happens.
I am too depressed to post pictures now, but I will try to put some up soon.
Saturday, March 9, 2013
Time for a Soak

As you saw in the cable post, we got a hot tub. We found it on my favorite website, Craigslist, so we saved a ton of money...as long as it works. It is a slightly used Hot Spring Prodigy. Hot Spring seems to be one of the top brands, so we are thinking it will last a while and not use too much energy.
It is also a good size for us; roughly 6'x7'. It supposedly fits five people.
Here's another angle.
The purchase process was quite trying. The seller was not the easiest person to work with and arranging all the necessary help at the same time was a challenge. Eventually, we got the seller, a couple friends, a pickup, and my brother all coordinated and we were able to pick it up on Feb. 24.
All transportation was perfectly safe. Maybe.

Getting it into position in the back yard was a challenge, but we did it. My biggest regret is using a furniture dolly from Harbor Frieght. Bad decision.
We are now contacting electricians to wire it up for us. Initial estimates are a bit spendy, so we will be getting some more quotes. Hopefully we will have it working soon.
Subscribe to:
Posts (Atom)