Thursday, January 22, 2015

Dash Dissection

Before
Since I removed the glove box and some driver side panels, there's quite a bit of unnecessary material in the Miata's dashboard.  The main inspiration for this project was to improve passenger knee room, but it would also save weight, so it's a win-win.

I started on the passenger side, removing as much plastic as feasible.  I am trying to keep the interior somewhat livable, but lighter and simplified.  After removing some plastic, I discovered there was a lot of unnecessary metal connected to the dash beam.

I relocated the ground (with stainless hardware) and cut a off a reasonable amount.

Here's what I removed from the passenger side.

And here's what it looked like afterward.  Sorry about the poor lighting.  This picture is from a low angle.  From normal eye level, it looks really clean.
After

The driver side was a bit more complicated.  I had some switch gear to work with, and a lot more wires to avoid.
Before
I started by hacking off some plastic, which revealed quite a bit of unnecessary metal, which I began attacking with the Dremel, but quickly switched to the Sawzall.  You might notice the hood release lost it's attachment point.  I wedged it in a new place against the side of the car.  Hopefully it doesn't rattle.
Plastic trimmed. Metal in place.
After
Here is everything I ended up removing.
Weight savings:  3 lbs
This was a pretty miserable project.  Lots of cramped spaces and awkward angles.  It would be much easier if the dash was removed from the car.  There's probably a lot more stuff that could be removed with the dash out, but that is something I don't want to deal with at this point.

Sunday, January 18, 2015

Kitchen Illumination

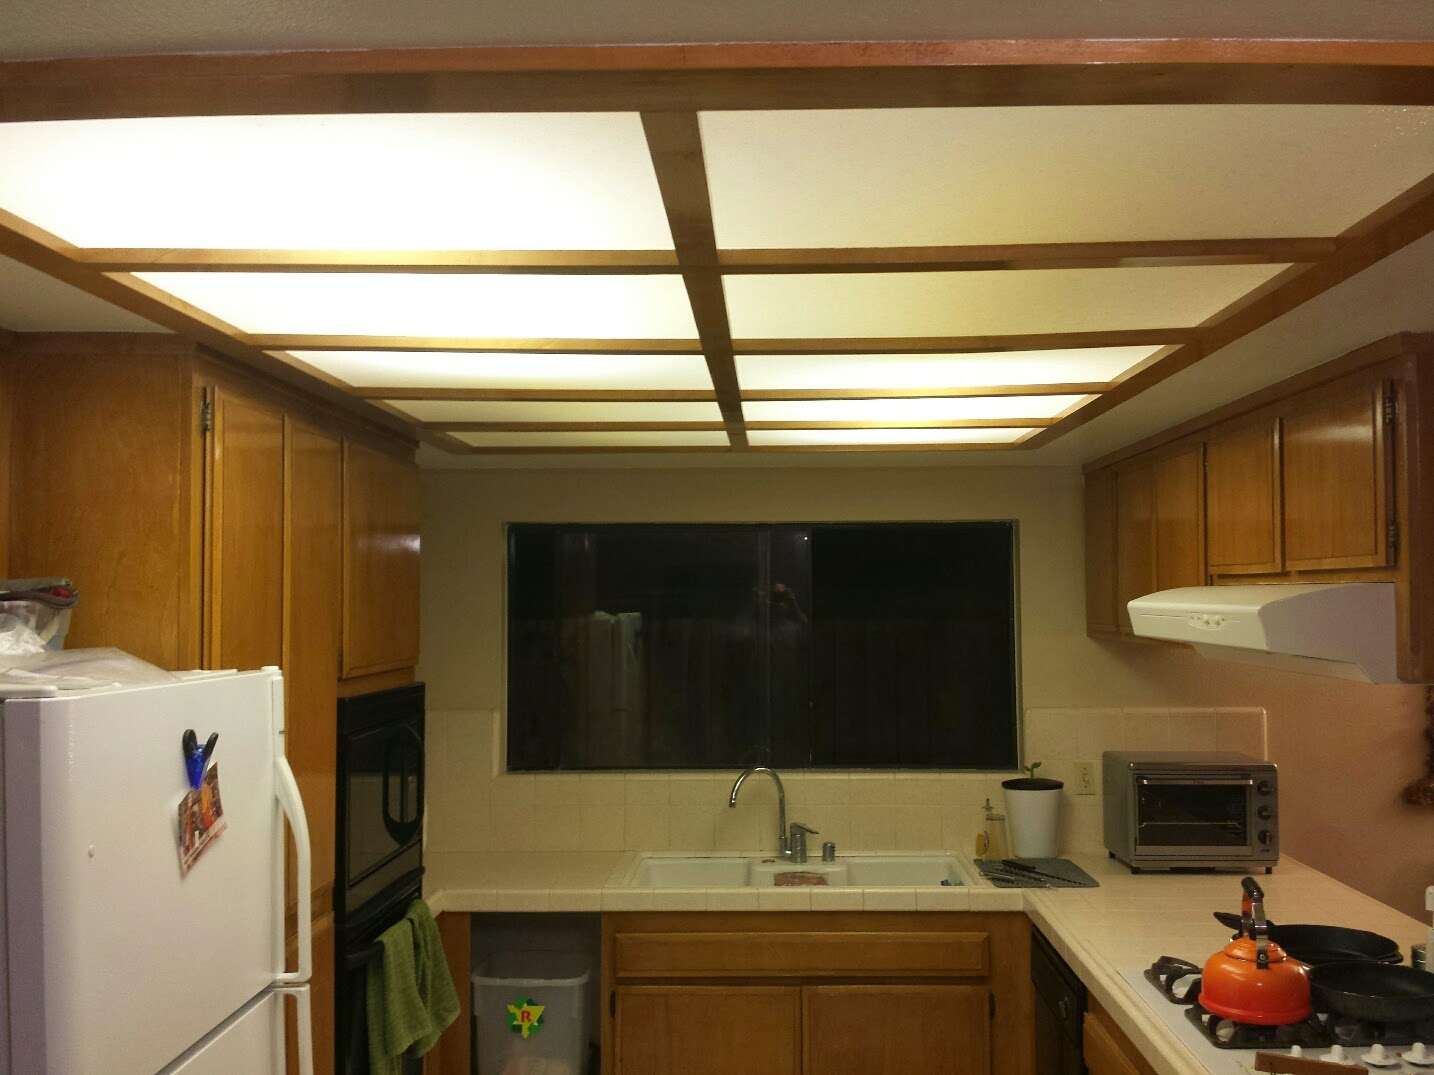
The lighting in our kitchen left a lot to be desired.  It was an old fashioned look with gross plastic panels that lowered the ceiling.  There were four fluorescent light fixtures mounted up there, but only two or three would work on any given day.  They also made a miserable buzzing sound.  I'm not sure why we didn't do this sooner.

We pulled out the plastic and it was clear this area was not pained properly.  There was also lots of over-spray from when they finished the wood.  It looked pretty gross.

The next step was to removed all the wooden cross-pieces.

And then the lights themselves.

With the lights gone, we sanded the wood border, filled the holes and gave it a coat of primer.


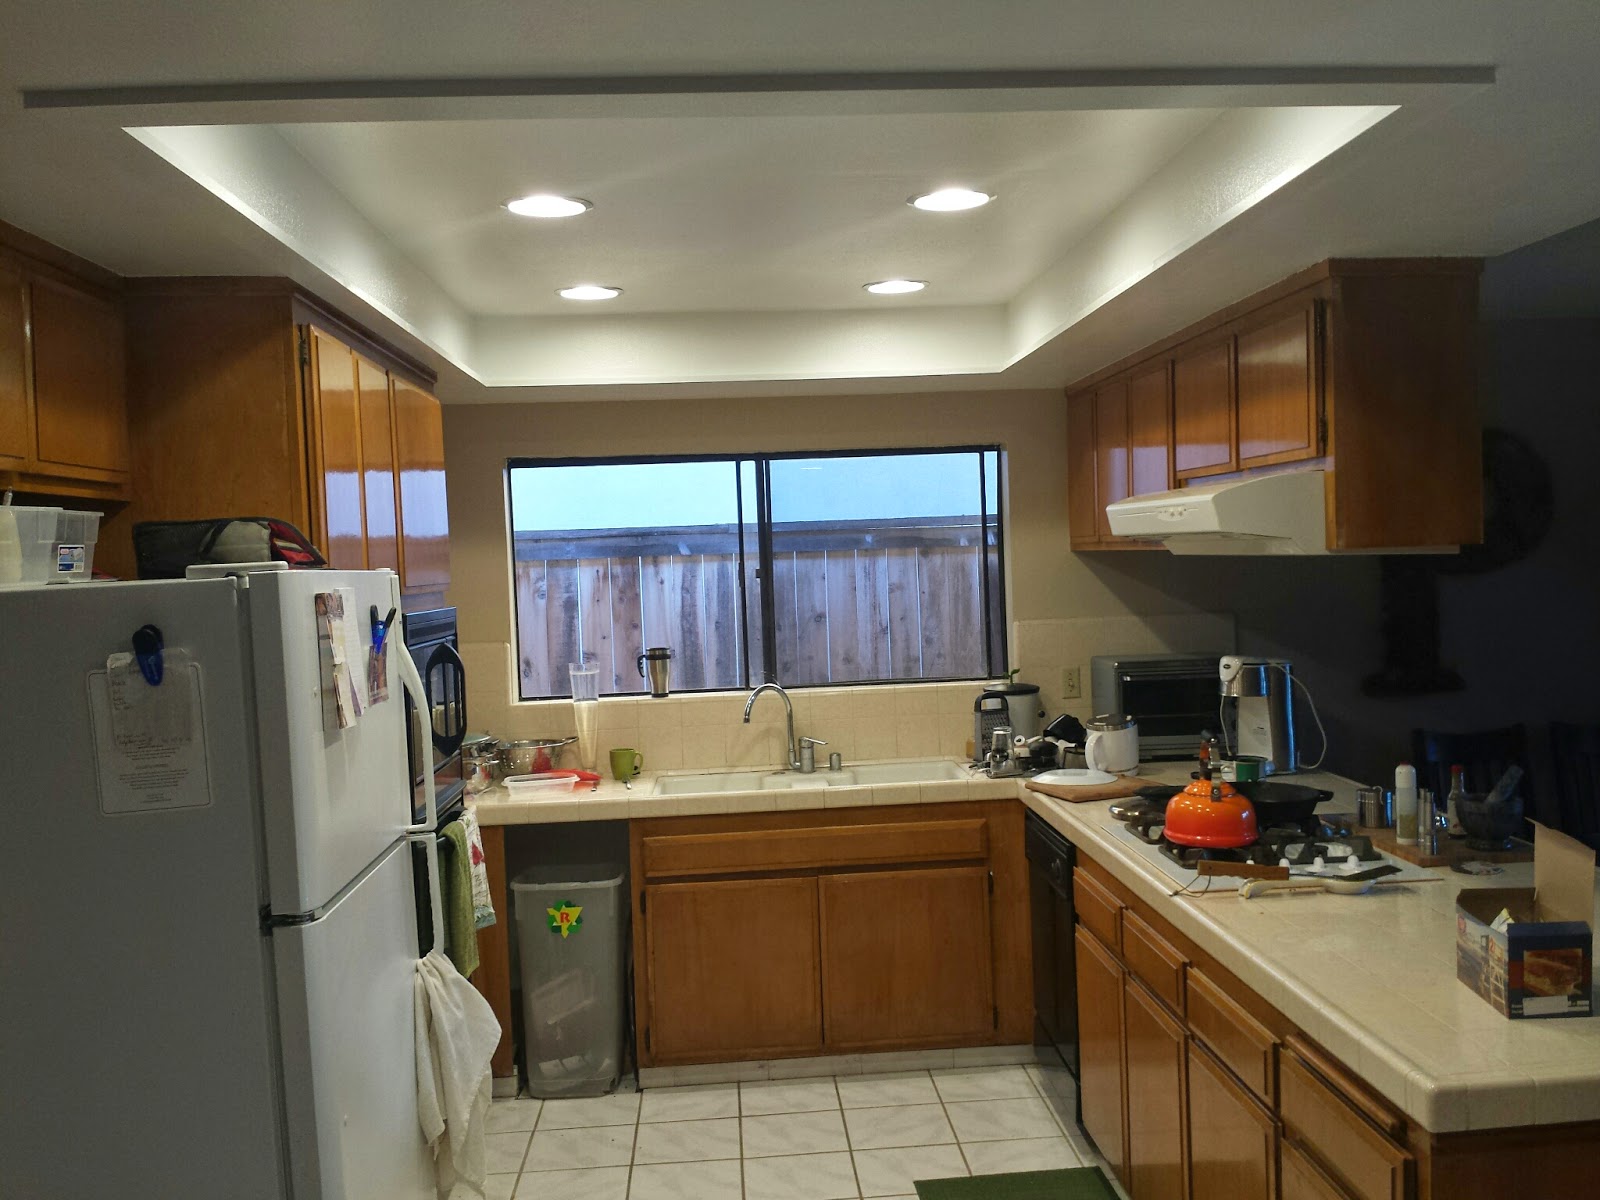
After that, it was finally time to start installing the new lights.  We went with six inch recessed lights paired with LED bulbs.  We got lights with traditional light sockets so it would be easier to replace the bulbs down the road.  We don't want to struggle to find a special LED unit if one craps out.
Placed with extreme precision

After all the holes were cut, it was time to venture into the attic.  My basic knowledge of AC circuitry proved sufficient to wire the lights.

It got pretty tight near the edges of the house.  Notice the nails sticking through the roof, trying to kill me.  I love lying face down in filthy fiberglass with daggers hovering inches above my scalp.

Check out this precision install.  Got a six inch light in an eight inch gap, and the hole was cut from below.

While I was wiring up the lights, Chrissy made a zero electricity dinner with the help of our crank charged flashlight.

Here's the installed cans, with no bulbs.

And they worked!


There were several more coats of paint and texture applied, which dragged out the project.  In total I think we did five coats of paint!

 But the paint eventually dried and we could install the finishing trim pieces.
After
The end result is amazing.  It really opened up the room, especially for us tall people.  It's so nice having enough light in the kitchen.  It's also nice they don't buzz.
This project cost about $400 in supplies and quite a few hours of time.  I also estimate the time in the attic took about two years off my life.
Here's a before shot again, to remind you what it looked like when we started.
Before

Saturday, January 10, 2015

Carb Clean-up

Before
The carburetors on the bike were in serious need of some attention.  As you can see, they were rather badly weathered and gummed up.
Before
I started by soaking the carbs in a bucket of Simple Green and water, which did wonders.  I then followed the instructions in my handy manual and rebuilt the first one several months ago.  It wasn't as bad as I expected it to be, but there were definitely a lot of small pieces to keep track of.  Since it was my first carb, I didn't want to get distracted by taking pictures, so I planned to get these blog photos when I did the second one.
Unfortunately, the idea of going through the second carb wasn't very appealing, so it sat untouched until today.
Unlike when I did the first carb, I set up a nice work area.

I then applied penetrating oil to all the bits that were to be unscrewed.  This is a very important step.

This is the view when the float bowl is removed.


And without the float.  You can see (from bottom to top) the needle valve, main jet, idle jet and mixture adjustment.  All of these were removed and painstakingly cleaned.  The mixture adjustment has to be returned to the same position it was in.

Here's the cap and diaphragm removed.  The needle must be cleaned and returned to the correct position.  I have new diaphragms, but the old ones were intact, so I held off on replacing them.

This is the choke (center) and throttle assembly (left).  Notice the rust.

Here's the choke housing removed.

This is what it looked like fully disassembled.  I took every one of these parts and cleaned them as well as possible.

I was prepared for this project with a carburetor rebuild kit.  It includes gaskets, o-rings and new diaphragms.

 Here's the difference between the old and new o-ring.

After cleaning and or sanding all the bits, I put it all back together again, and it looked like this.
After
After
You will notice the choke cable holder on this cap it a little crushed.  That happened when the carb fell off the storage shelf.  It was very unfortunate.  I'm going to try to salvage it, but I might have to buy a new cap.

Saturday, January 3, 2015

Shattered Speakers

The Miata's stock seats have speakers in the headrest, however, the pair in our passenger seat were not sounding too healthy.  They just kind of rattled.  When I peeled back the upholstery (made easy with a zipper) it was clear why the sound wasn't very good.  The speakers were completely shot.

I snipped the wires and pulled them out.

Here's what they look like outside the car.  Weight savings:  10.5 oz

Thursday, January 1, 2015

Holey Hose

The hose on our wedding vacuum cleaner developed a large slit.  I secured the two ribs adjoining the slit with a piece of wire and sealed everything up with some duct tape.  We'll see how well it holds.